Your First Service
This guide walks you through provisioning your first managed service on Servala.
Browse the service catalog
-
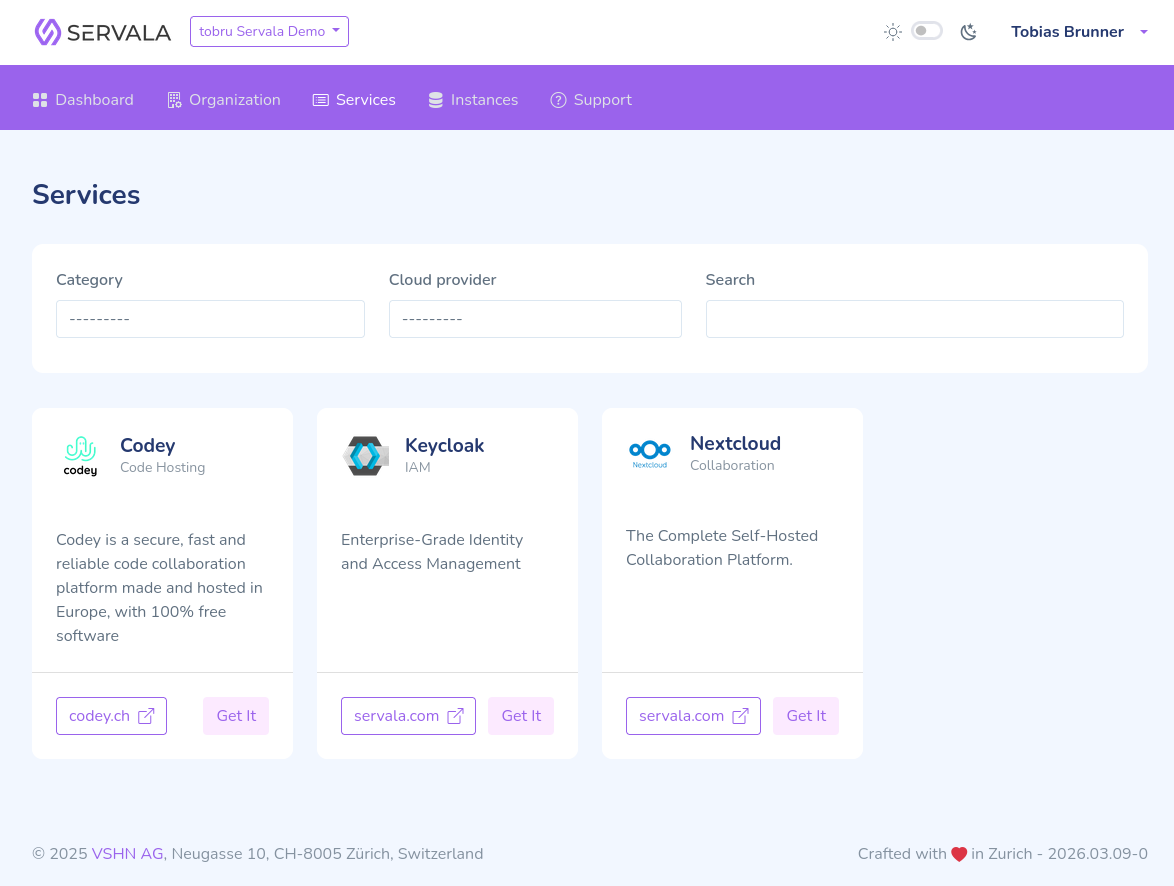
From the portal dashboard, navigate to the Services section.
-
Browse the available services.
-
Click on a service's Get it button to see its details, available cloud providers, and zones.
-
On the service detail page, you'll either get a choice on which cloud provider you want your service provisioned at, or directly get to the configuration form.
Configure your instance
-
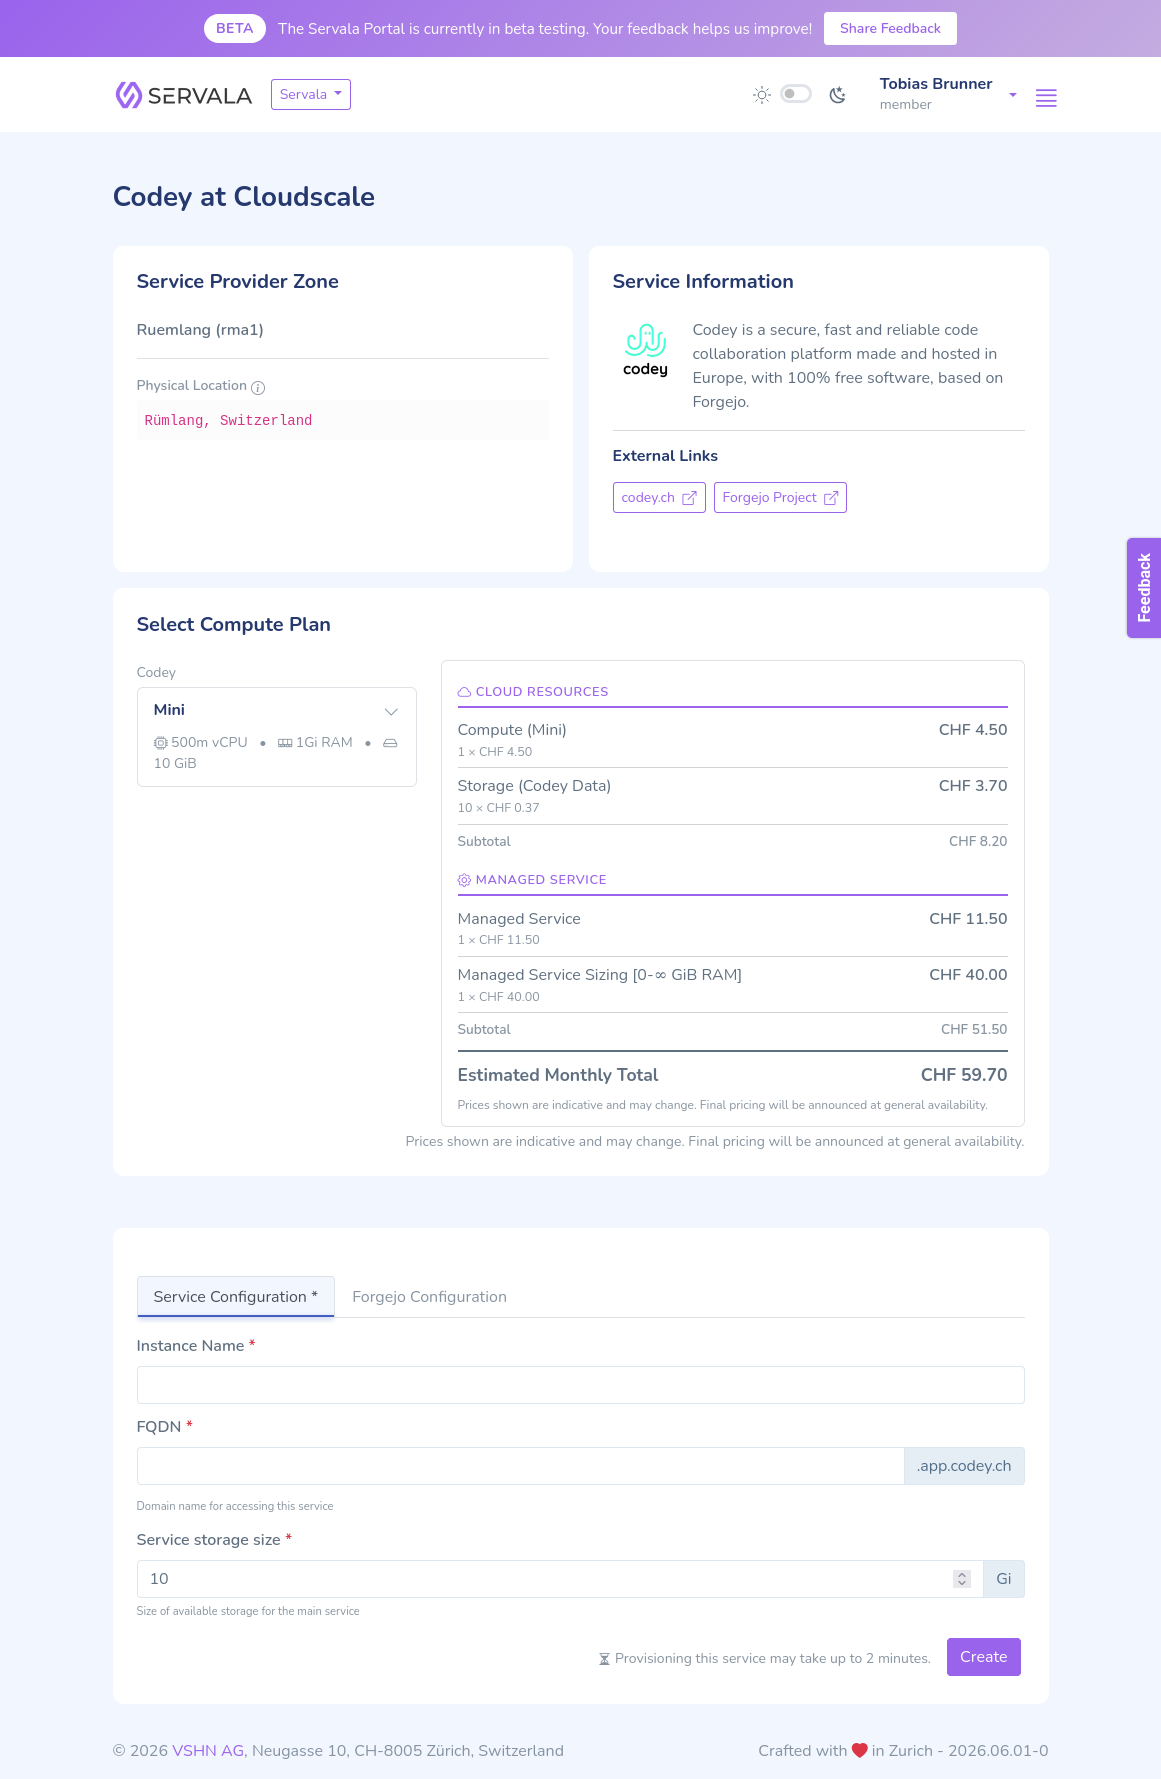
Select a Compute Plan and, if available, an SLA.
-
Enter an Instance Name for your instance (a human-readable name for your reference).
-
Configure the service parameters.
-
Review your configuration and click Create.
Monitor your instance
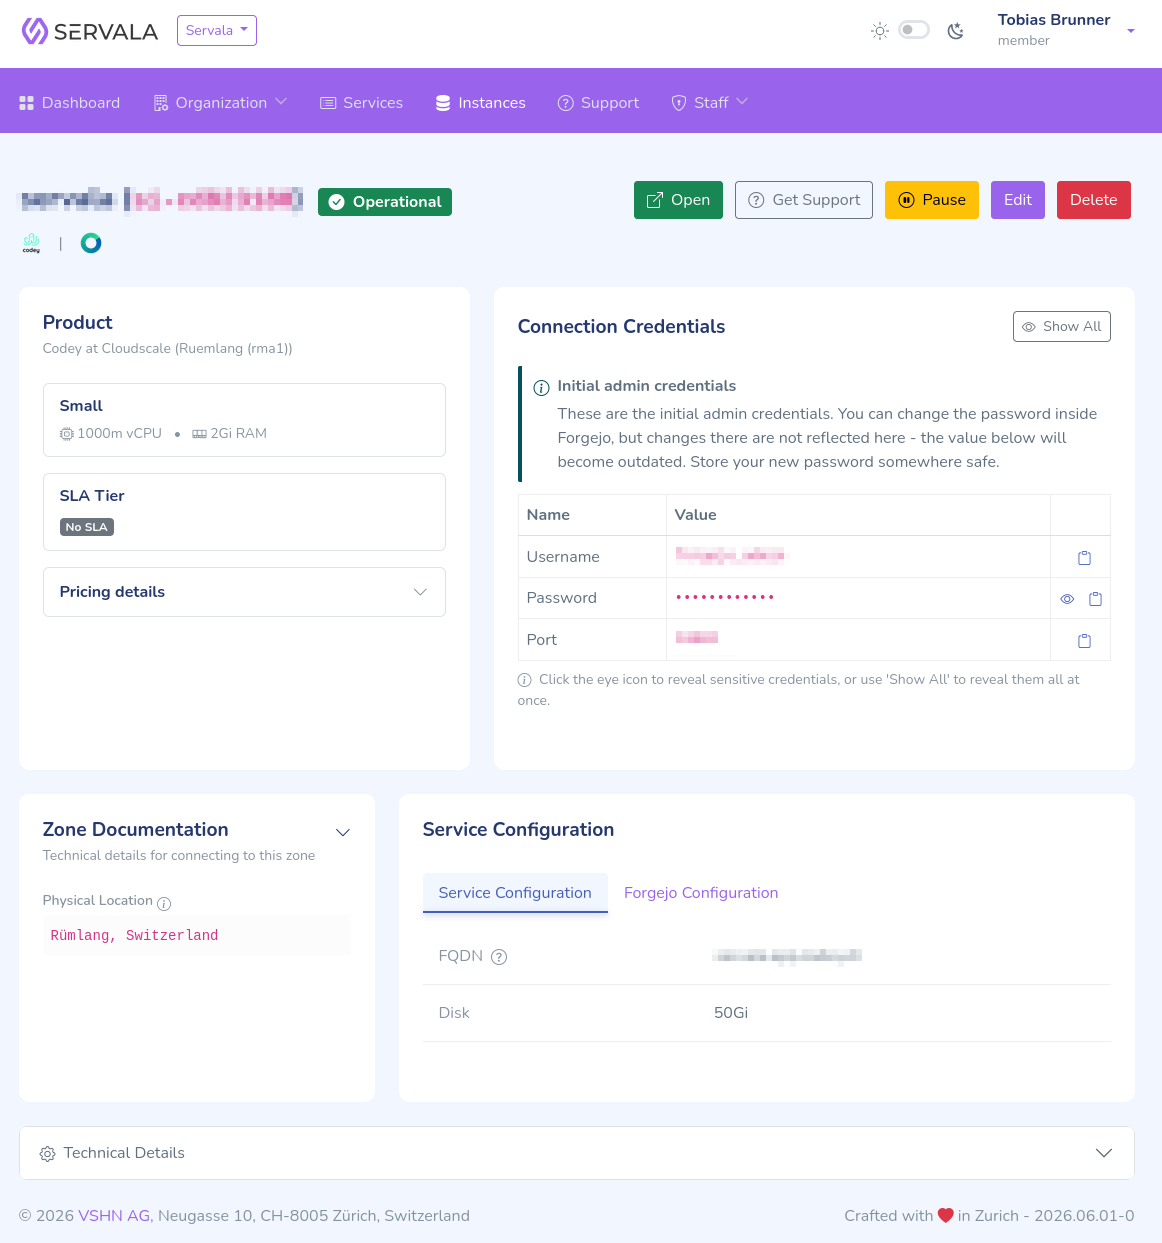
After creation, you'll be taken to the instance detail page where you can:
- Monitor the provisioning status
- View connection credentials once the instance is ready
- Access instance logs
Your instance will typically be ready within a few minutes.
Next steps
- Learn about Organizations to manage team access
- Read the Manage Instances guide for updating, pausing, and deleting instances
- Check the Services section for service-specific details