Manage Instances
This guide covers how to manage your service instances after provisioning.
View your instances
Navigate to the Instances section to see all service instances in your current organization.
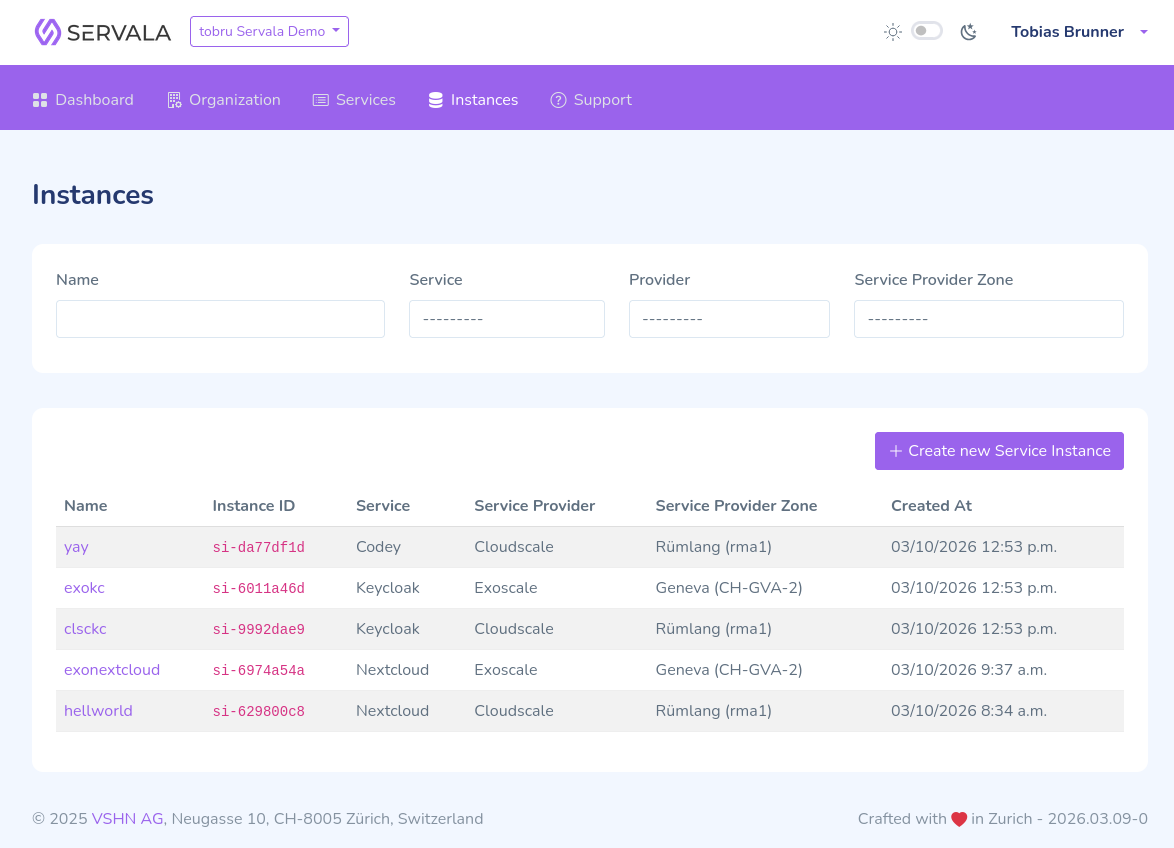
Click on any instance to see its detail page with configuration, status, and connection credentials.
Update an instance
- Navigate to the instance detail page.
- Click Edit.
- Modify the configuration parameters as needed.
- Click Update to apply the changes.
Warning
Some parameters are immutable. Check the service-specific documentation for details on which parameters can be updated.
Configuration changes are recorded in the organization audit log, including which fields changed and their values before and after.
Pause an instance
Pausing stops the service from running without deleting anything. The configuration, data, and storage are all kept. Only the running workload is stopped.
- Navigate to the instance detail page.
- Click Pause.
To resume a paused instance, click Unpause on the instance detail page. The service starts again and becomes available with its data intact.
Unpausing restores the replica count the instance had before it was paused.
A paused instance does not cause any compute costs. Storage and any cloud provider specific resources stay allocated while the instance is paused, and are billed for as long as they exist.
Delete an instance
- Navigate to the instance detail page.
- Click Delete.
- Confirm the deletion in the verification dialog.
Instances are protected against accidental deletion: the portal requires you to explicitly confirm the action before the instance is removed. This deletion confirmation step is the safeguard against deleting an instance by mistake.
Danger
Deleting an instance is permanent. All data associated with the instance will be lost. Make sure you have backups of any important data before deleting.
View connection credentials
Connection credentials (hostname, port, username, password) are available on the instance detail page once the instance is fully provisioned. Use these credentials to connect your applications to the service.
Access your backups
The instance detail page shows the backups of your instance where the service supports it. Organization administrators and owners can additionally reveal the credentials of the backup bucket and work with the backups using their own tooling. See Backups for details.
Restore an instance from a backup
For services that support it, organization administrators and owners can start a restore from the Backup Summary card on the instance detail page, or from a single row in the backups list.
A restore creates a new instance from the backups of the one you are restoring from. The instance you restore from keeps running, keeps its data, and keeps being billed, so plan for two instances until you have verified the restored data and deleted the one you no longer need. See Self-service restore for the full procedure, including how the restore point is chosen and what to check before submitting.