Provision a Service
This guide walks you through provisioning a new managed service instance.
Prerequisites
- You're logged in to the Servala Portal
- You have an organization selected
- Your organization has access to the service you want to provision
Steps
1. Browse the service catalog
Navigate to the Services section from the portal navigation.
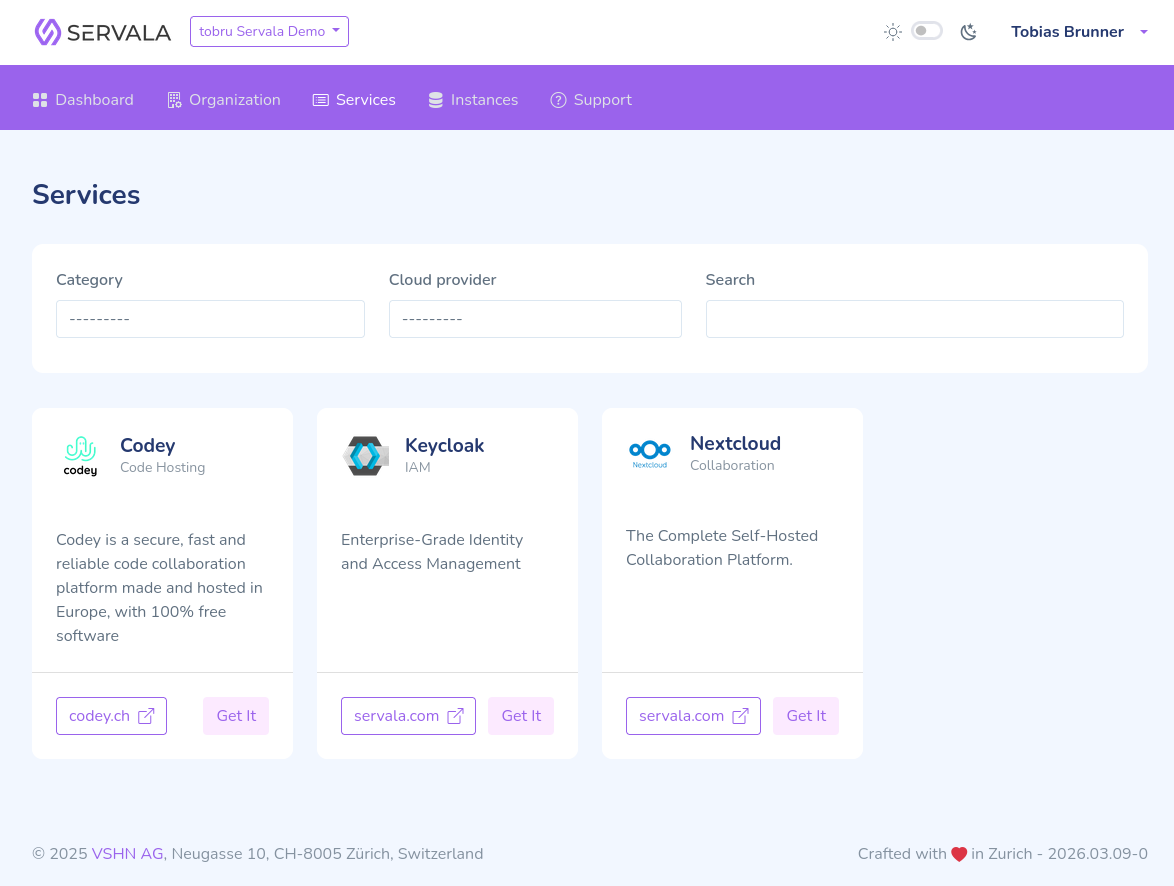
Browse or search for the service you need.
2. Select a service
Click on the "Get it" button on a service to see its detail page. Here you'll find:
- A description of the service
- Available offerings (provider + zone combinations)
- Links to documentation
3. Choose a provider and zone
Select the cloud provider that matches your requirements. Consider data residency, compliance, and proximity to your applications.
4. Configure the instance
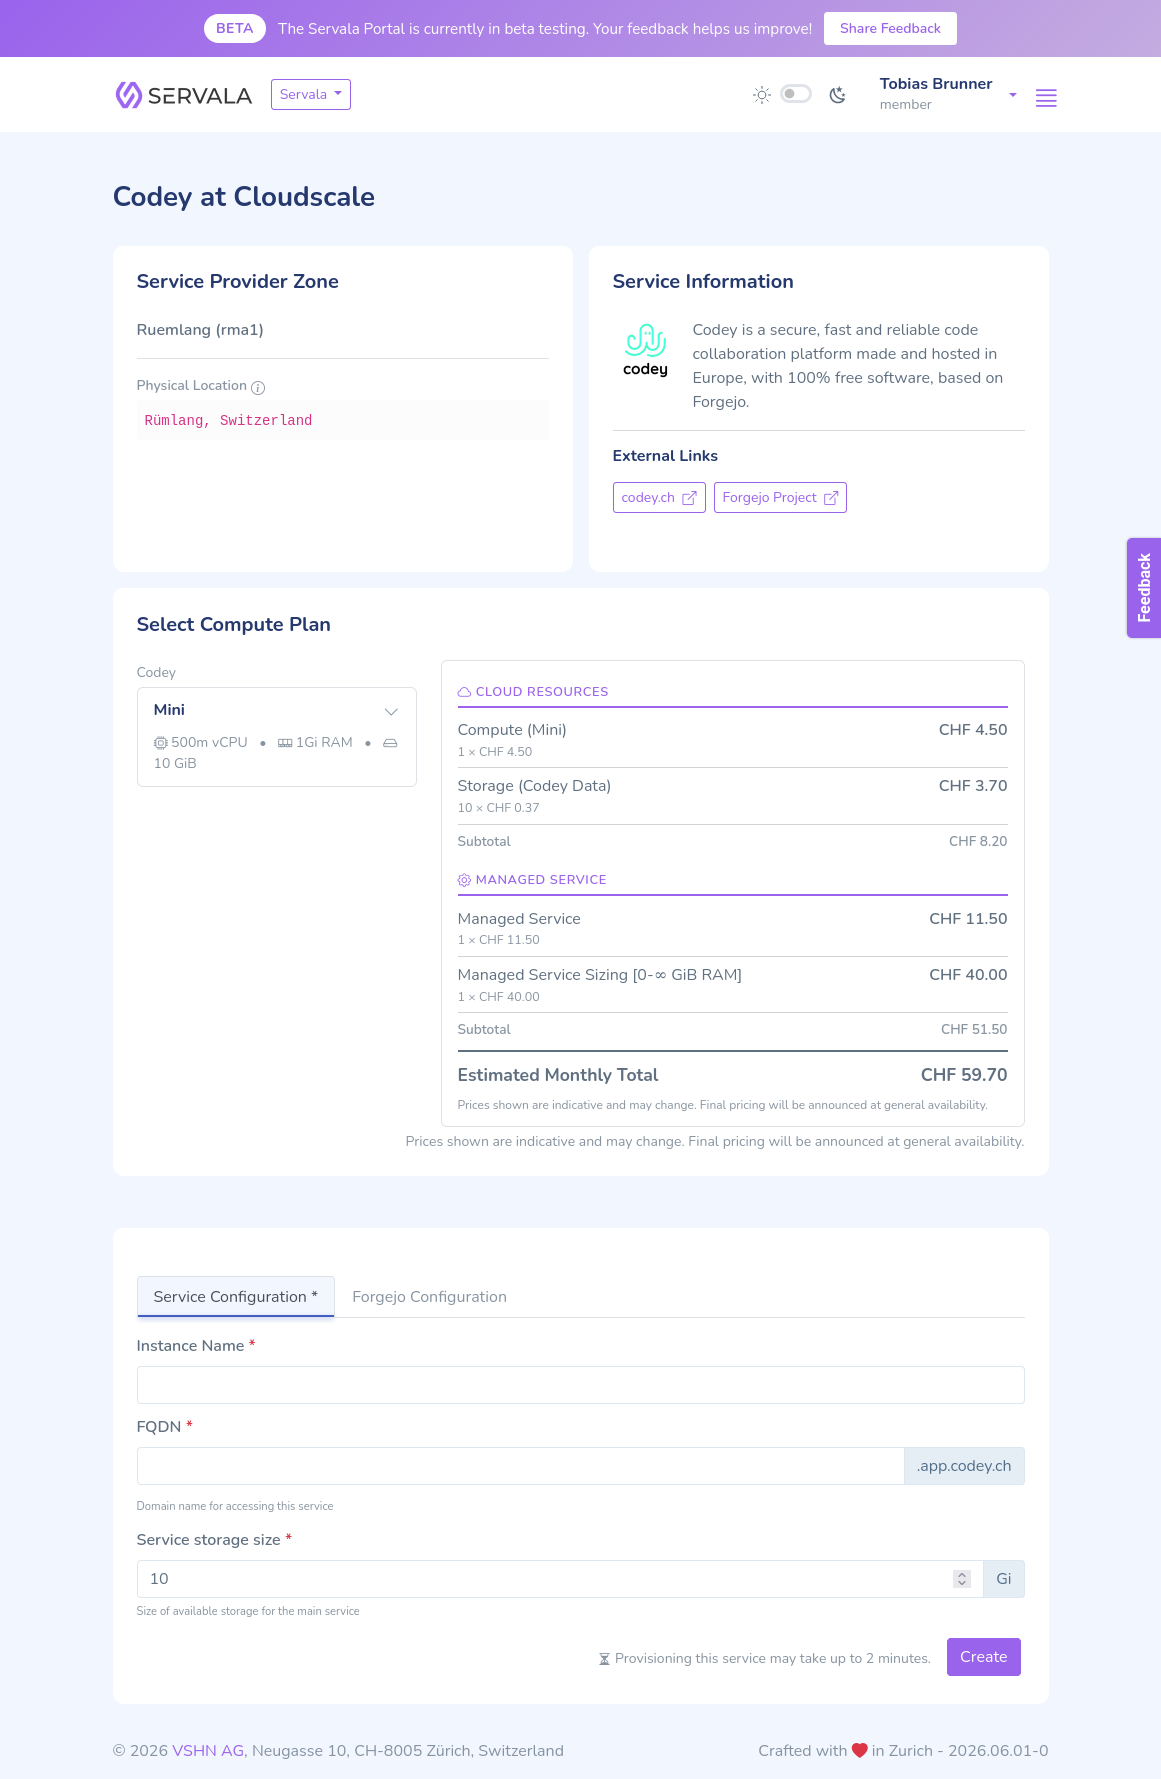
- Select a Compute Plan to define the resource tier (CPU, memory).
- Choose the SLA tier (if available).
- Enter a display name (Instance Name) for your instance.
- Configure service-specific parameters using the form. For services accessed over TCP (such as PostgreSQL, MariaDB, or Redis), this includes the network access mode. For services accessed over HTTP(S), the FQDN field sets the address: depending on the service you can point your own custom domain at the instance, either through the Advanced option or directly in the field.
5. Create the instance
Review your configuration and click Create. The portal will begin provisioning your instance.
6. Wait for provisioning
Provisioning typically takes a few minutes. You can monitor the status on the instance detail page. Once ready, connection credentials will be available on the instance detail page.